Page 1 of 1
Fuel Gauge - 4000 series
Posted: Fri Feb 24, 2023 11:11 am
by thebuildist
As I mentioned in another post, I've begun installing a fuel gauge in my Ingersoll 4020.
I ordered a 150MM sender/gauge kit from AliExpress, it was in the $25 range.
In preparation, after a great suggestion by
@DavidBarkey , I created a flange with threaded studs to go inside the tank, with the studs sticking upward.
I just cut out a 1/16" plate steel ring, drilled it to match the holes in the fuel sender, and tapped it for screws (#10-32). I then screwed the screws all the way in, and tack welded the heads to the ring, so now those permanent studs will stick up through the holes in the sender flange.
Next I prepared it to be fished in place through the gas cap hole. I ran it through the bandsaw to cut it into two slices, and then tack welded a piece of steel wire to each piece. Those wires can be bent to whatever shape I need in order to push each slice through the gas cap hole and then maneuver it into position.
With those ready to go, I then used my new battery powered fuel siphoning pump to drain my tank. Boy, that makes things easy. A well-spent $15.
First step is to drill a 35MM hole in the sender's desired location. (The float on the sender is 35MM across, so a 35-38MM hole is fine.)
I made a mistake here, and barely mitigated it: I didn't realize that the floor of the tank isn't flat. There's a raised ridge, particularly over on this left side where I've drilled.
So I couldn't mount the sender right where this hole is. I had to slide it all the way to the right side of this hole. That leaves the gasket not making full contact over on the far left side, but I think it'll be ok. If I had drilled another 1/2" to the left, it would have been disaster.
(continued)
Re: Fuel Gauge - 4000 series
Posted: Fri Feb 24, 2023 11:20 am
by thebuildist
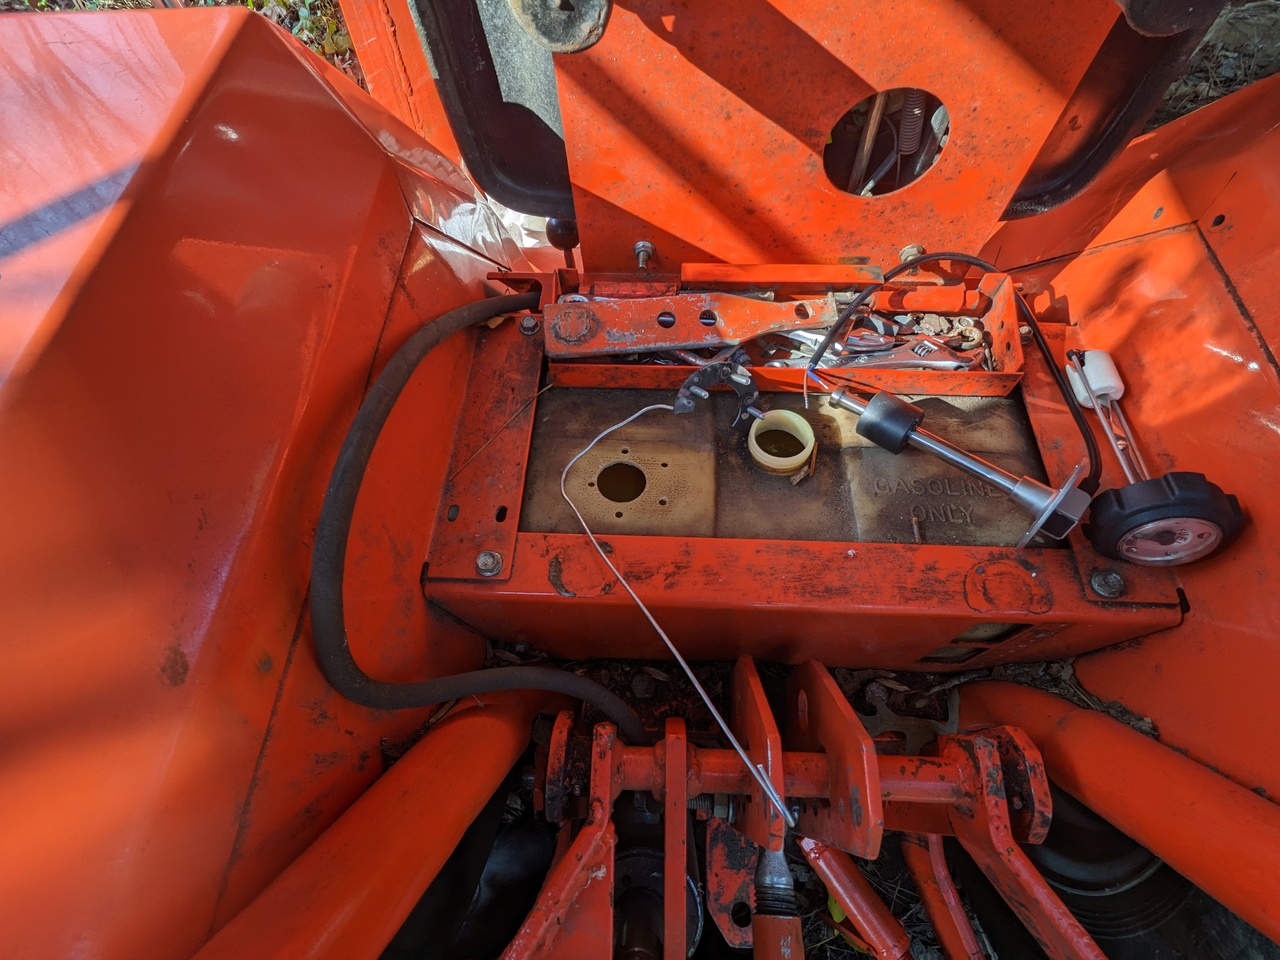
Next it was time to get out my Fuel Tank Vacuum.
I don't recall if this specialty tool is made by Snap-On or Mac or... Milwaukee? But it's TOP QUALITY, I can tell you that.

- PXL_20230224_145117803.jpg (924.96 KiB) Viewed 2093 times
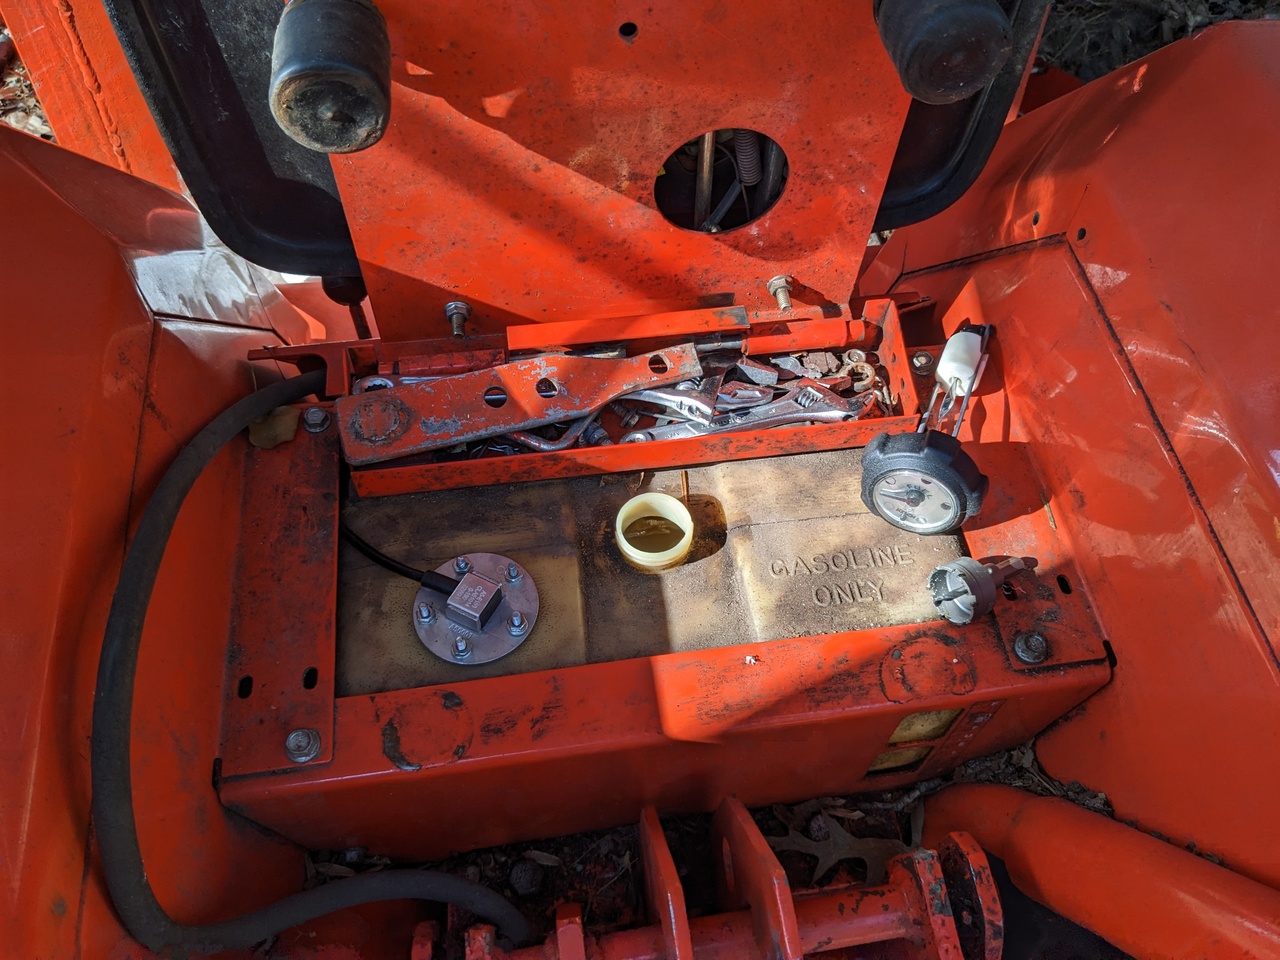
Having sucked all the drilling debris out of the tank, I bent the "fishing" wires to the shape I wanted, and fished the two inner flange halves into place.
- PXL_20230224_145558756.jpg (485.48 KiB) Viewed 2093 times
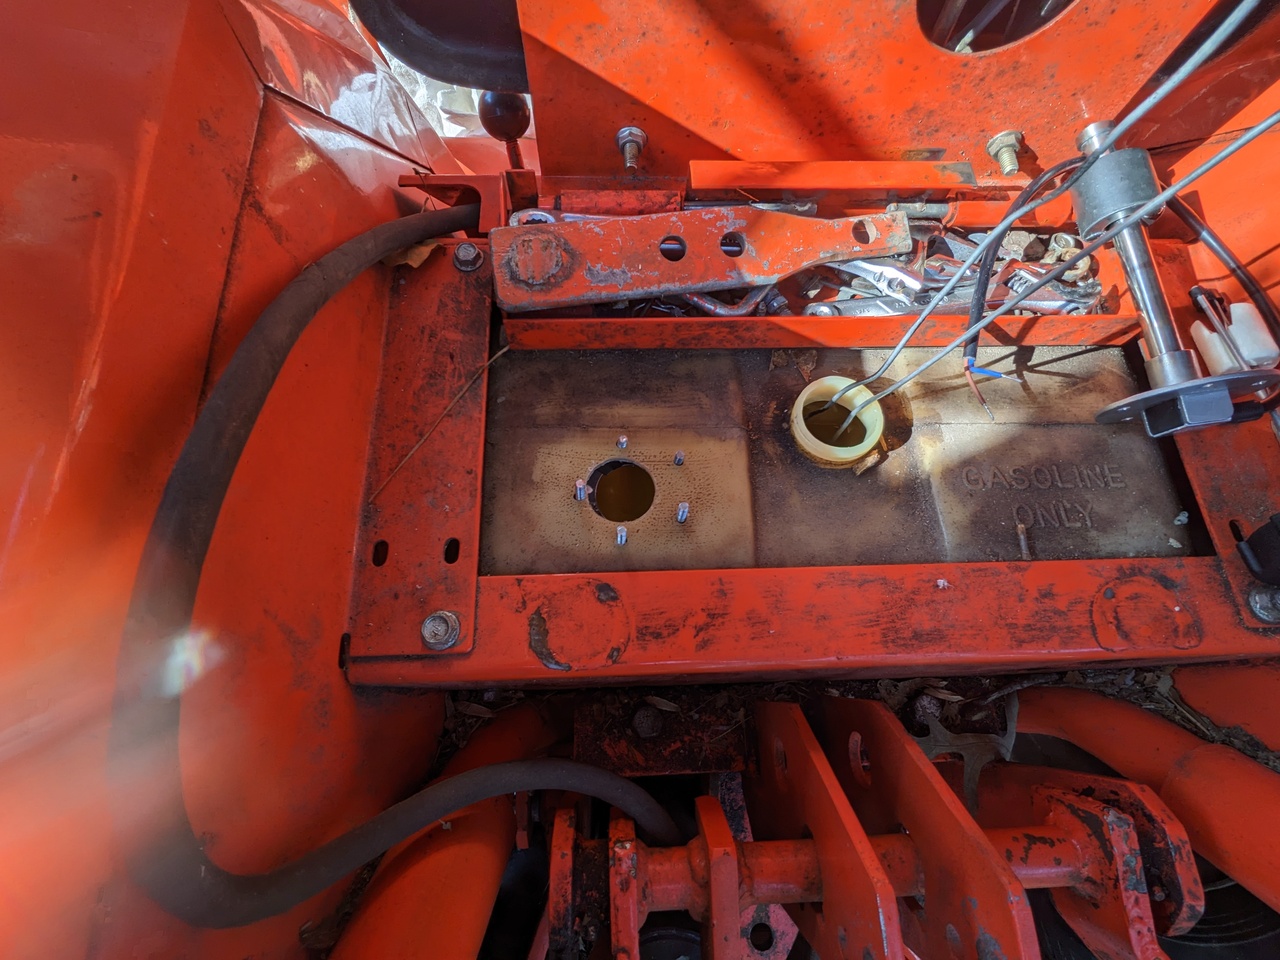
- PXL_20230224_150008171.jpg (490.44 KiB) Viewed 2093 times
This step was made harder than it should have been by the necessity to bolt everything in offset to the right side of the hole. That meant that I had to insert the sender float before I could wiggle the flanges into their final location. It was fiddly, but not crazy.
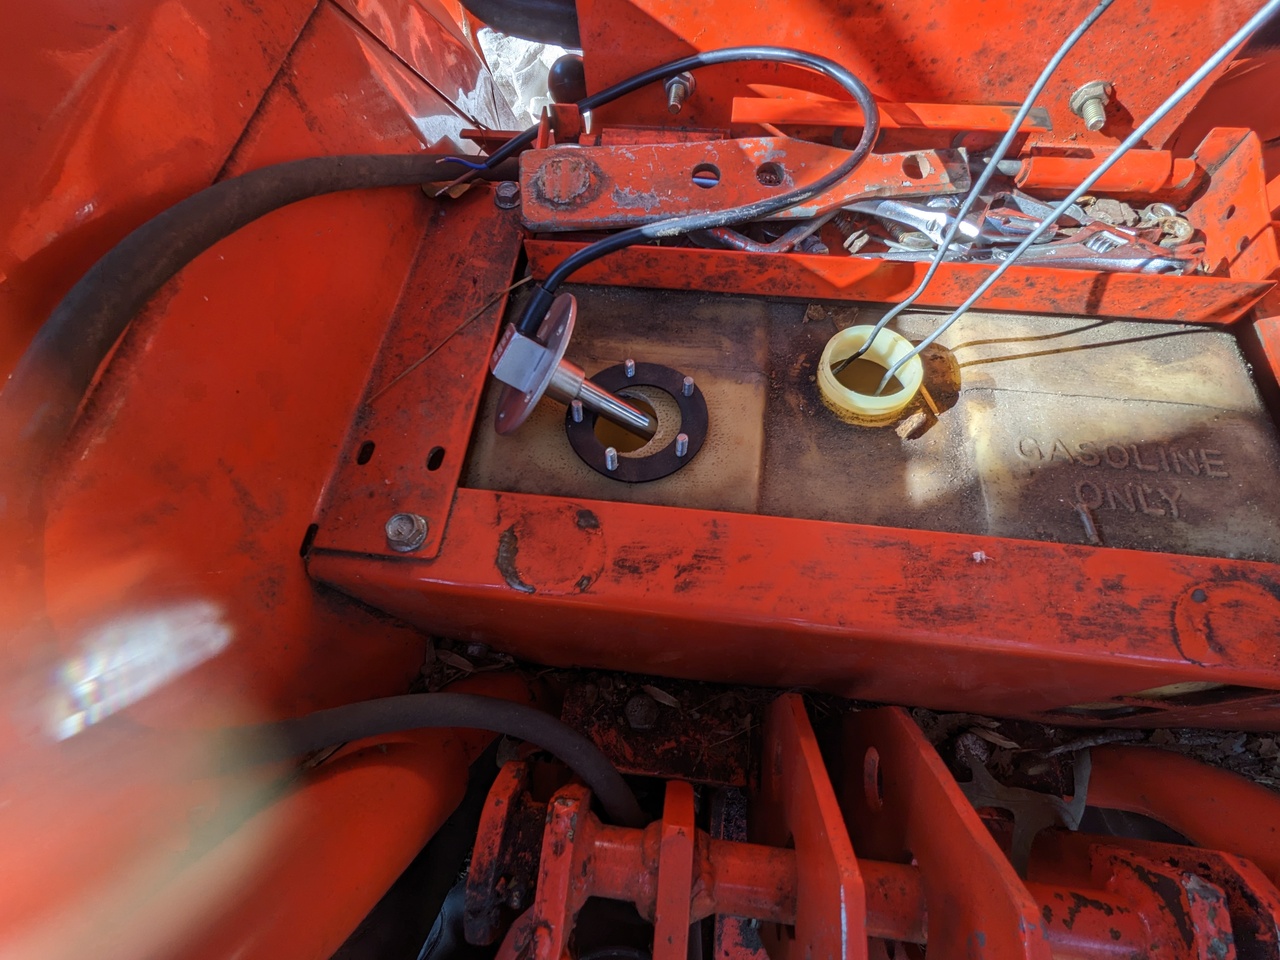
- PXL_20230224_150348745.jpg (484.5 KiB) Viewed 2093 times
I went ahead and torqued all five nuts (gently) before I roughly wiggled the fishing wires back and forth to cause them to "wring off" right at the point that they were tack welded.
- PXL_20230224_151254856.jpg (533.21 KiB) Viewed 2093 times
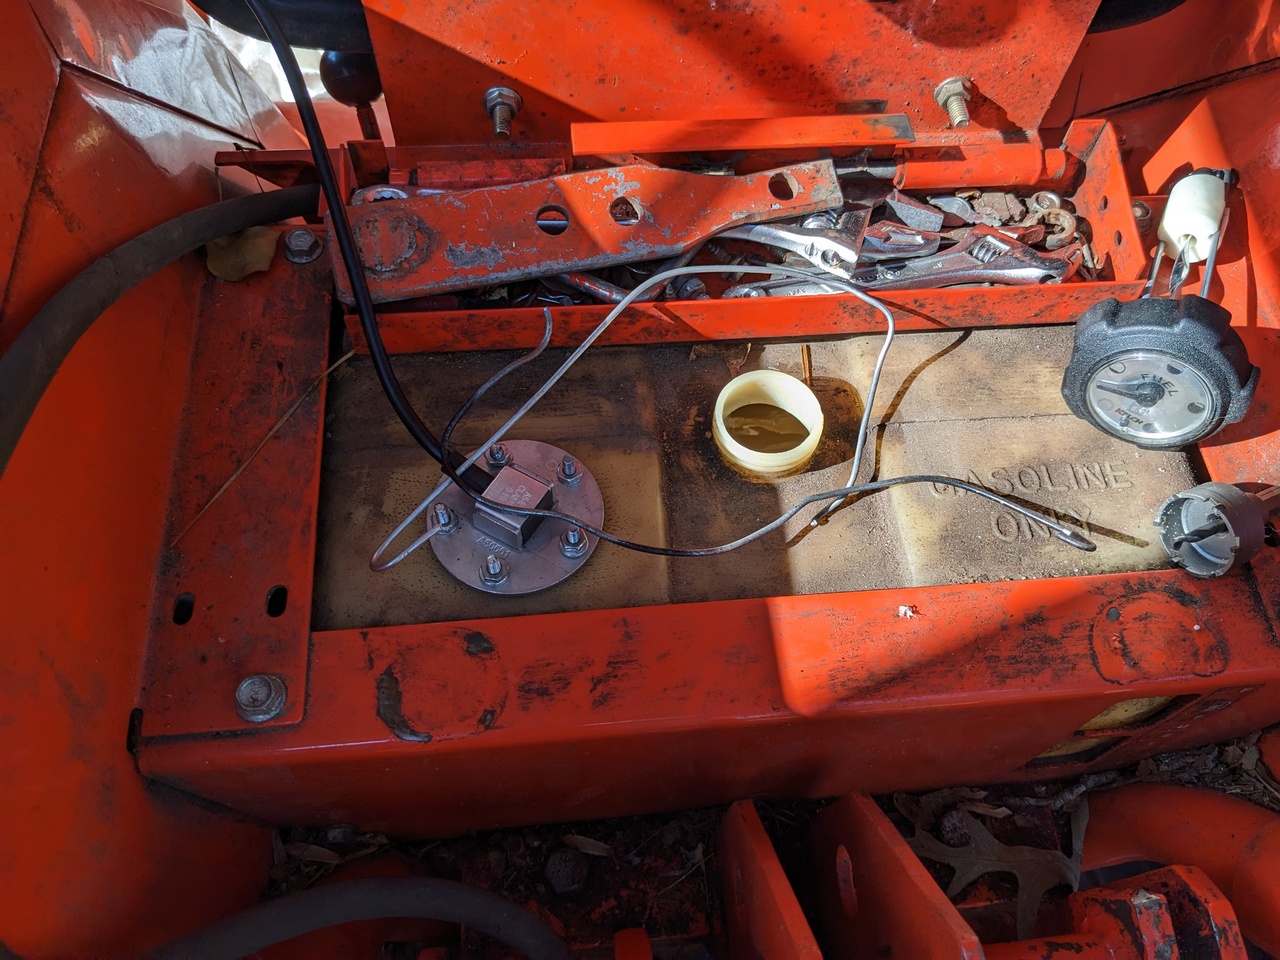
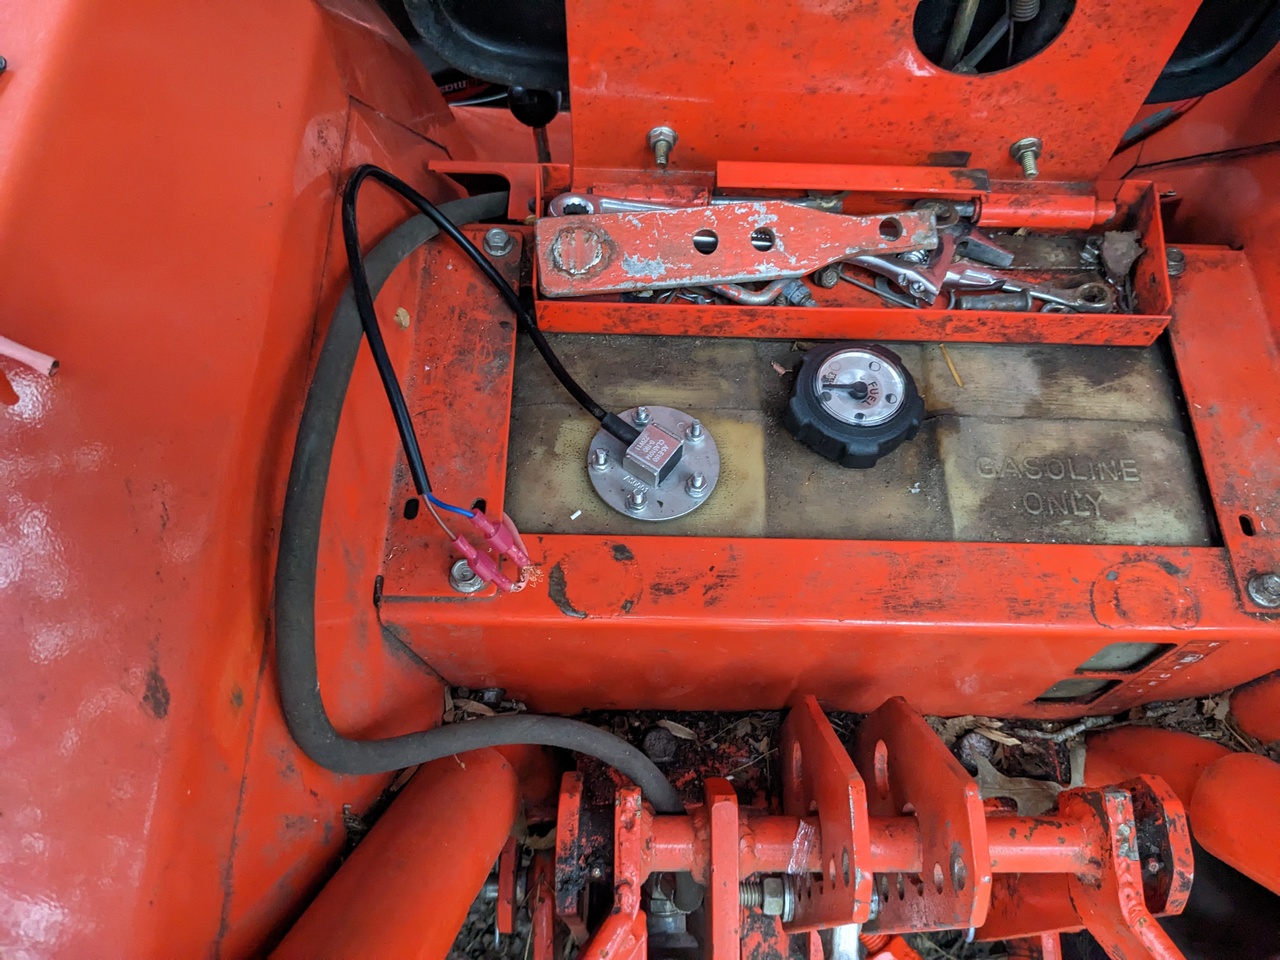
And then simply tuck the sensor wire over around the side of the fuel tank. With that, the sender install is complete.
Again, if you do this mod, drill the 35MM hole about 3/4" farther right (closer to the gas cap) than I did.
- PXL_20230224_151406717.jpg (496.96 KiB) Viewed 2093 times
- PXL_20230224_151434796.jpg (433.69 KiB) Viewed 2093 times
I'll check back in with the actual gauge install in a couple days or so.
Bob
Re: Fuel Gauge - 4000 series
Posted: Fri Feb 24, 2023 11:29 am
by Eugen
That's clever!
If I may suggest, some double sided foam tape on the upper side of the two crescents so they don't fall in/wiggle about when you place the sender on may help.
Edit: while I was writing you already finished lol
Nicely done Bob!

Re: Fuel Gauge - 4000 series
Posted: Fri Feb 24, 2023 11:50 am
by DavidBarkey
Nicely done Bob .
Re: Fuel Gauge - 4000 series
Posted: Fri Feb 24, 2023 1:20 pm
by thebuildist
Ok, full write up coming. But initial testing ( just temp/twisted wire hookup) shows that either the gauge or the sender is actually digital, not analog. How I know this is that, with the gauge hooked up, I slowly filled the tank. And the gauge went from "empty", then instantly to precisely"1/4" , then instantly to precisely "1/2", then instantly to precisely "3/4" then instantly full.
I'm slightly disappointed. I'd rather have a full analog sweep of readings, rather than always rounded to the nearest quarter. But I can at least confirm that the gauge is actually calibrated to the tank overall. Empty tank=empty gauge and full tank=full gauge.
So it'll be functional, and it's way nicer to have than an inoperative hour meter.
More to come.
Bob
Re: Fuel Gauge - 4000 series
Posted: Sat Feb 25, 2023 10:46 am
by thebuildist
I wrapped it up this morning, and I'm pleased with how it turned out.
I fished a multi-conductor cable (What I'd refer to as "hvac thermostat wire) down into the frame area and back to underneath the fuel tank. I'd need to remove the deck to really zip tie the cable perfectly in place, so the next time I'm under the machine without the deck in place I'll do that. For now it's laying in a safe-ish channel, not likely to get pinched or snagged. The sender has two wires, one to 12V ground, and the other to gauge sender input.
So the "thermostat" cable running from the gauge to the sender carries two conductors, "gauge/frame" ground to sender ground, and "gauge sender input" to sender output. (The braided shield is the ground, and the inner conductor is "sensor")
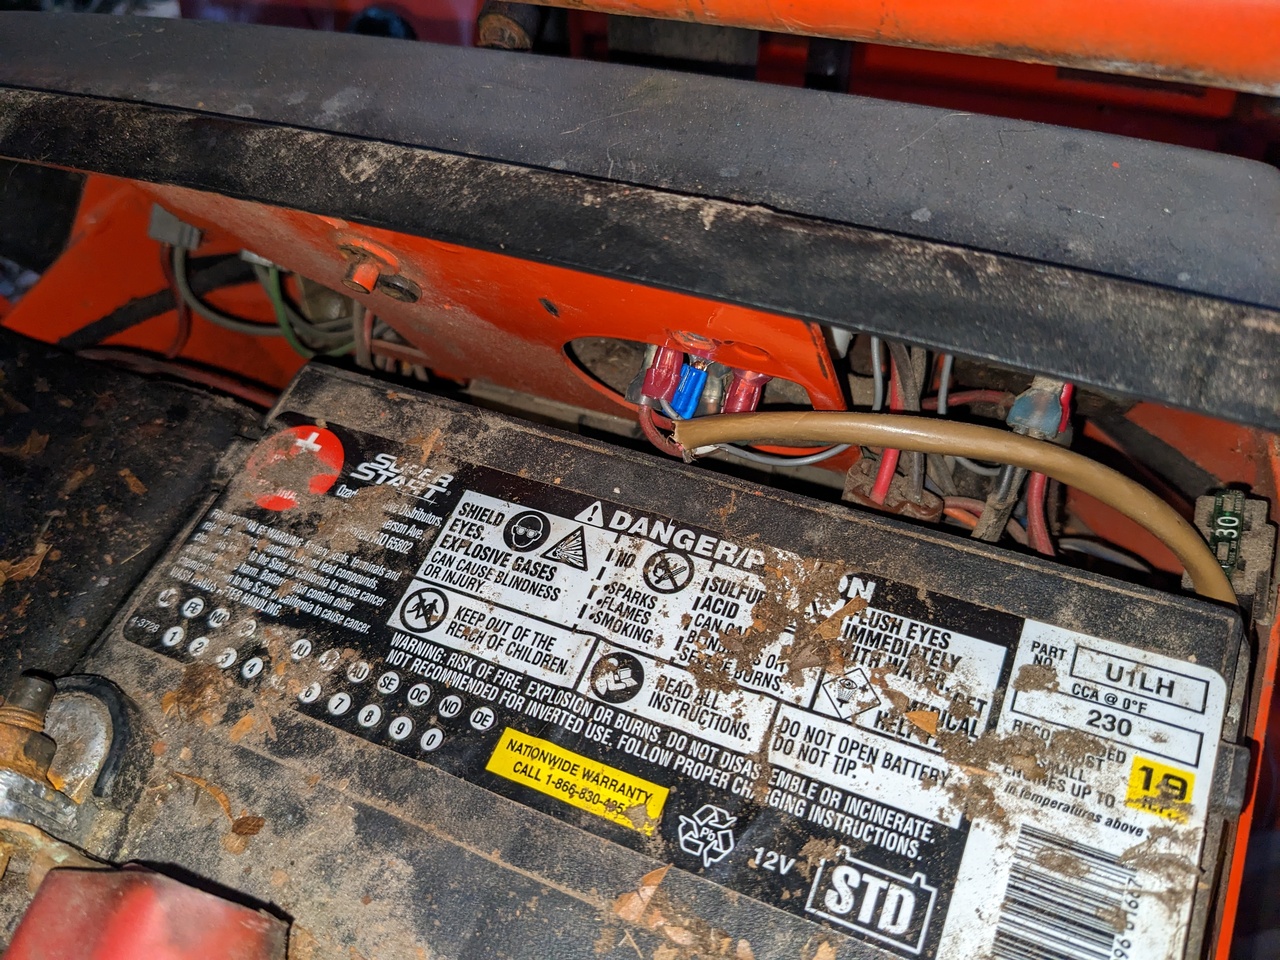
From there I just hooked up the rest of the gauge as per its instructions: A wire to 12V ground, a wire to 12V accessory hot, a wire to 12V "lights on" hot, and a wire to sender output.
When I removed the hour meter, it had both accessory hot and ground hooked up to it. So I was able to plug those into the fuel gauge. But I needed to pull an extra ground wire off to run down to the sender. For pulling off an extra wire any time you're working with spade terminals, these piggyback spade terminals are really handy.
https://www.amazon.com/smseace-Terminal ... B08DCRRL2J
With that all done, the gauge now works, and the backlight comes on with the headlights.
- PXL_20230225_130206823.jpg (508.79 KiB) Viewed 1994 times

- PXL_20230225_130206823b.jpg (486.17 KiB) Viewed 1993 times
- PXL_20230225_130538831.jpg (707.27 KiB) Viewed 1994 times
Bob
Re: Fuel Gauge - 4000 series
Posted: Sat Feb 25, 2023 1:03 pm
by Eugen
I call this luxury!

Very nice!!
Re: Fuel Gauge - 4000 series
Posted: Sat Feb 25, 2023 2:20 pm
by keith
Thanks for posting with all the good pics. That guage looks nice in the dash.

Re: Fuel Gauge - 4000 series
Posted: Sun Feb 26, 2023 1:31 pm
by ras101
Thanks @thebuildist for an excellent write up and pics. Been looking for a while about discarding my volt/ammeter and you my friend have convinced me. My new GT build will include a cab that as you probably know restricts getting to the gas tank and even though I could look through the holes in the rear seat support at the supposedly clear tank from the rear I want to know real time what my fuel status is without getting out of the cab. Thought about cutting another hole in the dash for a new gauge but I am not sure yet but for me a fuel gauge wins hands down every time! I can sit in my cab, see my fuel status, and get back to refill the tank before I run out and have to get the fuel can when the engine stops. Should say I do more than one driveway when I snow blow.
Went online and visited the site that thebuildist bought his but not sure I found the exact same gauge though as they have a couple of pages of different gauges but I did order one that seemed equivalent.
Looking forward to installing this on my GT rebuild and will provide 3D drawings of the parts used.
I will be following a lot of Bobs ideas here with a couple of changes , mainly the internal clamp. That I will pick slightly thicker material (possibly aluminum), and thread the bolt holes (no welding!) and also tack that in place with silicone.
This together with an electric pump and hose on my gas can will make life easy.
Ray
Re: Fuel Gauge - 4000 series
Posted: Sun Feb 26, 2023 3:53 pm
by ssmewing
I did an old-school one once. It was a simple sight glass that was clear tubing.
I replaced the 90 in the bottom of the tank and installed a tee. The one outlet went back to the fuel line for the engine. The other I connected the clear hose. The rear seat support needed some holes drilled in it and some rubber grommets to protect the hose. Once everything was done I trimmed the end of the hose to it could be tucked out of view at the top of the tank.

Re: Fuel Gauge - 4000 series
Posted: Sun Feb 26, 2023 4:22 pm
by ras101
So the most unfortunate thing about the AliExpress website is that part number info is not given (that I can see anyway!). I must admit though that site has everything you could ever ask for in gas gauge technology and more. Know the depth of your tank, size (dia) of your gauge, you will find what you want... For me I followed the guidelines and ordered a 150 mm tank gauge, etc. Let you guys know if that works, etc.
Re: Fuel Gauge - 4000 series
Posted: Mon Feb 27, 2023 12:00 pm
by Gordy
ras101 wrote: ↑Sun Feb 26, 2023 1:31 pm
Thanks @thebuildist for an excellent write up and pics. Been looking for a while about discarding my volt/ammeter and you my friend have convinced me. My new GT build will include a cab that as you probably know restricts getting to the gas tank and even though I could look through the holes in the rear seat support at the supposedly clear tank from the rear I want to know real time what my fuel status is without getting out of the cab. Thought about cutting another hole in the dash for a new gauge but I am not sure yet but for me a fuel gauge wins hands down every time! I can sit in my cab, see my fuel status, and get back to refill the tank before I run out and have to get the fuel can when the engine stops. Should say I do more than one driveway when I snow blow.
Went online and visited the site that thebuildist bought his but not sure I found the exact same gauge though as they have a couple of pages of different gauges but I did order one that seemed equivalent.
Looking forward to installing this on my GT rebuild and will provide 3D drawings of the parts used.
I will be following a lot of Bobs ideas here with a couple of changes , mainly the internal clamp. That I will pick slightly thicker material (possibly aluminum), and thread the bolt holes (no welding!) and also tack that in place with silicone.
This together with an electric pump and hose on my gas can will make life easy.
Ray
Long ago I suggested that everyone with those opaic tanks rig up a cover for the site area. The reason being that one of mine had a layer of white crud on it so I could not see the fuel level. Well I lightly scratched at it with my finger nail and ended up with my finger in the tank

The tractor must have spent most of its life outside as the white crud was apparently UV degraded plastic, as the rest (covered) of the tank was OK. Back then I contacted our 3 dealers, 2 did not have a tank but 1 did and said it was the last 1 he had. So I lucked out, otherwise I would have had to go with an old black tank.
Gordy
Re: Fuel Gauge - 4000 series
Posted: Mon Feb 27, 2023 1:08 pm
by Eugen
ssmewing wrote: ↑Sun Feb 26, 2023 3:53 pm
I did an old-school one once. It was a simple sight glass that was clear tubing.
I replaced the 90 in the bottom of the tank and installed a tee. The one outlet went back to the fuel line for the engine. The other I connected the clear hose. The rear seat support needed some holes drilled in it and some rubber grommets to protect the hose. Once everything was done I trimmed the end of the hose to it could be tucked out of view at the top of the tank.
Are you not worried that it gets grabbed by something and ripped off?
Re: Fuel Gauge - 4000 series
Posted: Mon Feb 27, 2023 1:13 pm
by DavidBarkey
Eugen wrote: ↑Mon Feb 27, 2023 1:08 pm
ssmewing wrote: ↑Sun Feb 26, 2023 3:53 pm
I did an old-school one once. It was a simple sight glass that was clear tubing.
I replaced the 90 in the bottom of the tank and installed a tee. The one outlet went back to the fuel line for the engine. The other I connected the clear hose. The rear seat support needed some holes drilled in it and some rubber grommets to protect the hose. Once everything was done I trimmed the end of the hose to it could be tucked out of view at the top of the tank.
Are you not worry that it gets grabbed by something and ripped off?
If you feel that is a concern . do like they did in the old days where they were glass level sights and put inside of a metal guard that is bolted in place .
Re: Fuel Gauge - 4000 series
Posted: Mon Feb 27, 2023 1:26 pm
by thebuildist
ras101 wrote: ↑Sun Feb 26, 2023 4:22 pm
So the most unfortunate thing about the AliExpress website is that part number info is not given (that I can see anyway!). I must admit though that site has everything you could ever ask for in gas gauge technology and more. Know the depth of your tank, size (dia) of your gauge, you will find what you want... For me I followed the guidelines and ordered a 150 mm tank gauge, etc. Let you guys know if that works, etc.
That should work, as long as your tank is the same as mine.
Bob